Update process
Follow the steps below to carry out the upgrade process of a Veronte Autopilot 1x:
Important
Since the most frequently updated device is Veronte Autopilot 1x, this user manual uses this device as an example. However, all other devices require the same procedure.
Steps marked with
 are not necessary if the upgrade version does not change the first two numbers (major and minor).
For example, they are not required from 6.12.58 to 6.12.68 but they are necessary from 6.8.126 to 6.12.68.
Connect the device (to be updated) to a computer with Veronte Link.
Then, open Veronte Updater and select the connected device in the marked area:
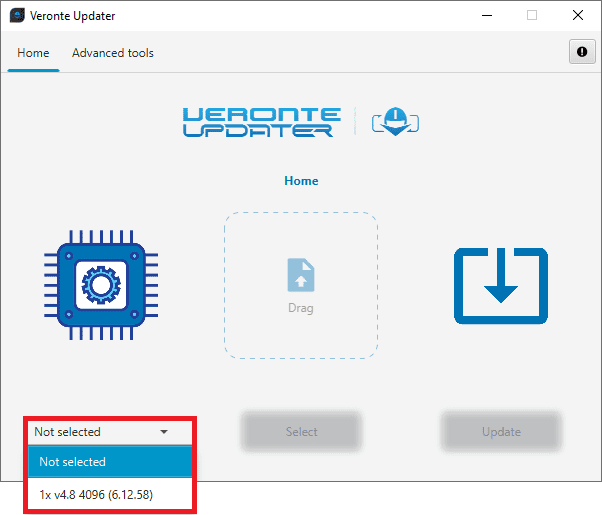
Selecting connected device
Load the .update file.
There are two ways to do this, dragging the file to the Drag area or by using the Select button.
The latter option will open the following browser to select the .update file stored in the user’s local storage:

Loading file
Once the .update file is loaded, click on Update to send the configuracion to the device.
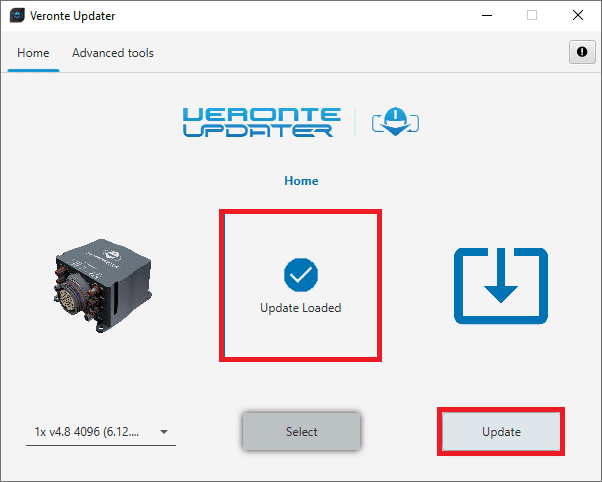
Update loaded
 At this point, depending on the Veronte Autopilot 1x firmware version, different warning messages will be displayed:
If the device is a Veronte Autopilot 1x whose previous firmware version is 6.4 or lower, the update process will not be able to proceed:
Error
It is not possible to upgrade an Autopilot 1x with firmware version 6.4 or lower to 6.12 directly, users must first upgrade it to 6.8 and then to 6.12.
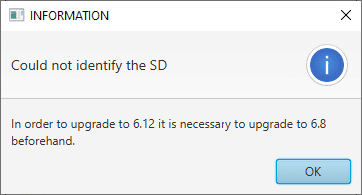
Firmware version ≤ 6.4 - Warning message
If the device is a Veronte Autopilot 1x whose previous firmware version is 6.8, depending on the SD capacity different warning messages will be displayed:
If it has a file memory capacity of 8 GB, the upgrade process will not be able to proceed:
Error
Please send it to Embention, so that the SD card can be updated.
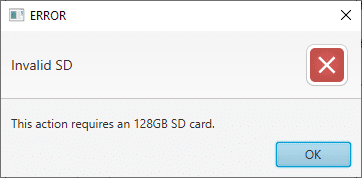
Firmware v6.8 and SD 8 GB - SD warning message
If it has a file memory capacity of 128 GB, an additional action is required after the upgrade process is completed.
Warning
Users shall upload the magnetic field and geoid data into the Autopilot 1x file memory when the update process is complete.
 If the upgrade process can continue, i.e. if the Autopilot 1x has a SD 128 GB and the previous firmware version is 6.8, the following message will appear. This is because upgrading a device will format it and a backup is the only way to restore the previous configuration.
This configuration file will be needed later.
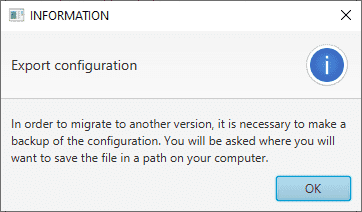
Export configuration message
 Choose the folder where the backup will be stored as a .ver file:
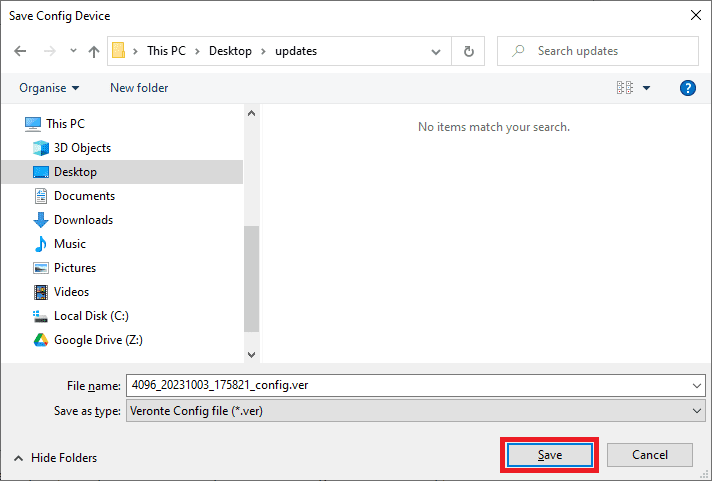
Save .ver file
The update process will start, the following windows will show the progress:

Update device process
When finished, click on Done:

Update device process finished
 Finally, upload the .ver file obtained in step 6.
Use the PDI Builder software for the updated device, in this case, the 1x PDI Builder.
Open the app, select the unit and click Upload PDI.
Note
During the update the device has been formatted and consequently the Autopilot 1x configuration has been deleted. Therefore Veronte Link will show it as Loaded with errors and CFG: Failed load config.

Veronte Link - Loaded with errors
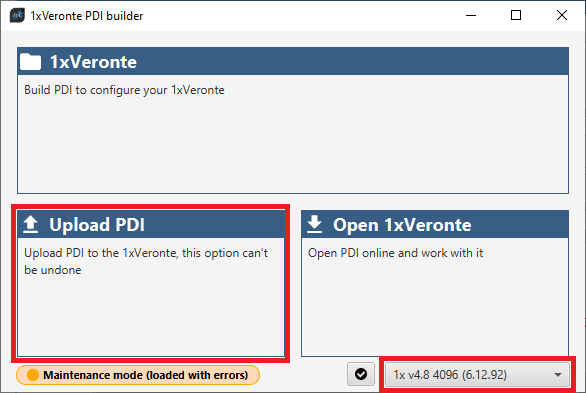
1x PDI Builder - Upload PDI
 Select the .ver file and click open to load it into Autopilot 1x.
1x PDI Builder - Select .ver file
Autopilot 1x should then switch to Normal mode and Ready status:

Veronte Link - Normal mode and Ready
 Once the update process is complete, users must upload the magnetic field and geoid data into the Autopilot 1x file memory. For more information on this process, please refer to the Upload partition data section of this manual.

